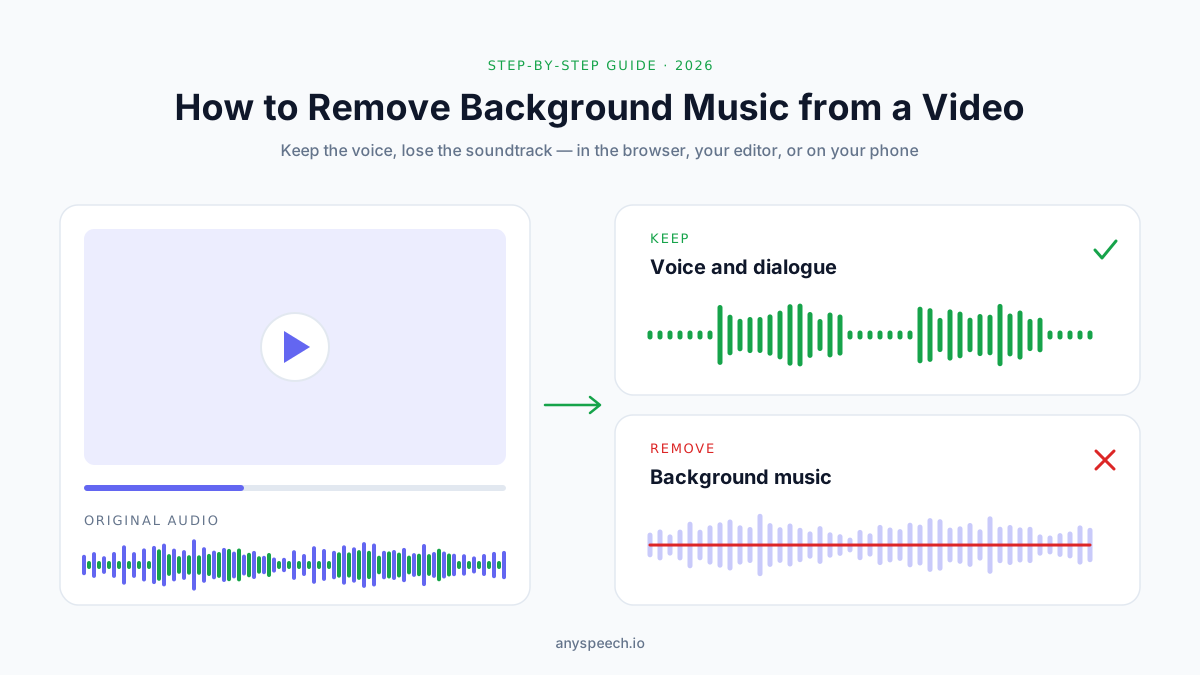
How to Remove Background Music from a Video (7 Ways, 2026)
Remove background music from a video and keep the voice. 7 methods: online AI tools, CapCut, YouTube Erase song, Resolve, Premiere, iPhone and Audacity.
You recorded a great interview, tutorial or vlog. Then you noticed the music.
Maybe it's a copyrighted song playing under your talking. Maybe the music drowns out the dialogue. Or maybe you need a clean voice track to translate, subtitle or re-edit.
Until recently, the honest answer was "you can't." Music and speech are baked into the same audio track, and no filter could pull them apart.
AI changed that. Today you can remove background music from a video and keep the voice, often in a few minutes, sometimes without installing anything.
But there's a catch most guides skip: different tools remove different things. Some keep sound effects, some throw them out, and some only work on YouTube.
This guide covers seven methods and helps you pick the right one for your clip.
What you'll learn:
- The four different goals behind "remove background music," and the right tool for each
- The extract → clean → replace workflow that nearly every method relies on
- Step-by-step instructions for CapCut, YouTube Studio, DaVinci Resolve, Premiere Pro, After Effects, Final Cut Pro, iPhone and Audacity
- Copy-paste FFmpeg commands to swap a video's audio track
- How to fix robotic voices, lost sound effects and lip-sync problems
- What removing music does (and doesn't) do for copyright
Quick answer: To remove background music from a video but keep the voice, export the video's audio, run it through an AI voice isolator to strip the music, then replace the original audio with the clean track in your video editor. If the video is already on YouTube with a copyright claim, use Erase song in YouTube Studio instead. To keep sound effects as well, use a dialogue/music/effects separator such as DaVinci Resolve Studio's Dialogue Separator.
First, What Do You Actually Want to Keep?
"Remove the background music" can mean four very different things. Getting this right first saves you from using a tool that removes too much, or too little.
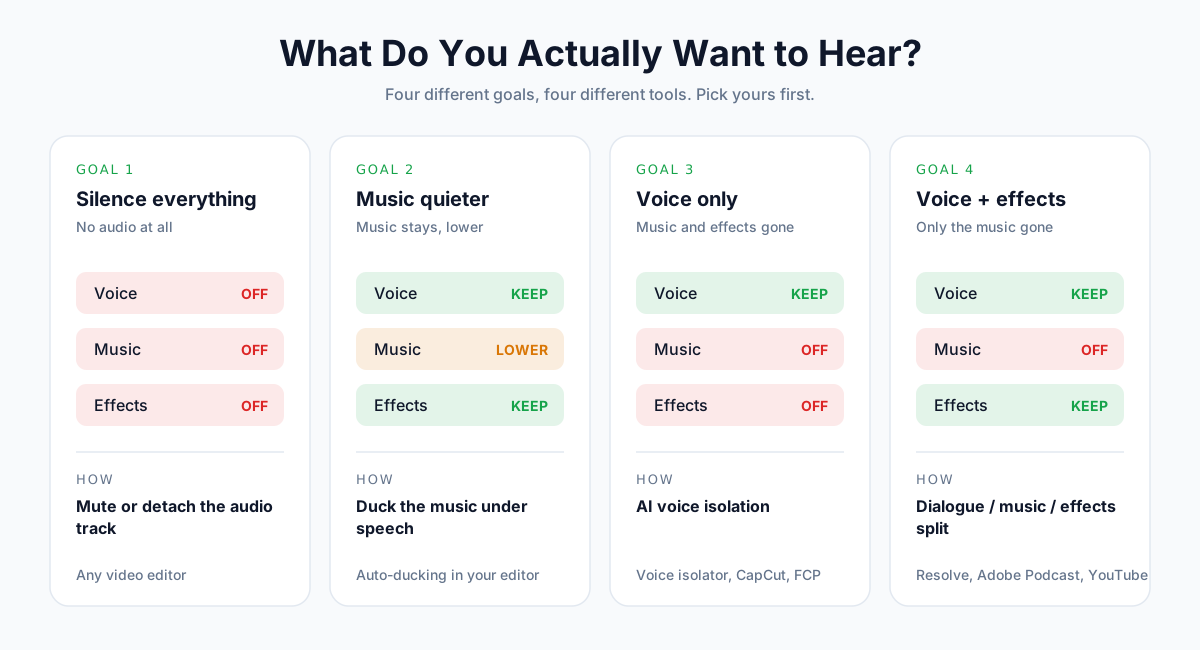
Goal 1: Silence Everything
If you don't need any of the original audio, you don't need AI at all. Mute the clip or detach its audio in any video editor, then add a new soundtrack or voiceover.
Goal 2: Make the Music Quieter
If the music is fine but too loud, ducking is faster and cleaner than removal. Your editor automatically lowers the music whenever someone speaks.
Goal 3: Keep Only the Voice
This is the most common request: dialogue stays, everything else goes. An AI voice isolator handles it well. Just know that footsteps, applause and room ambience usually disappear along with the music.
Goal 4: Keep the Voice and the Sound Effects
This is the hardest job. You need a tool that splits audio into three parts: dialogue, music and effects. Only a handful of tools do this well.
Which Tool Type Keeps What?
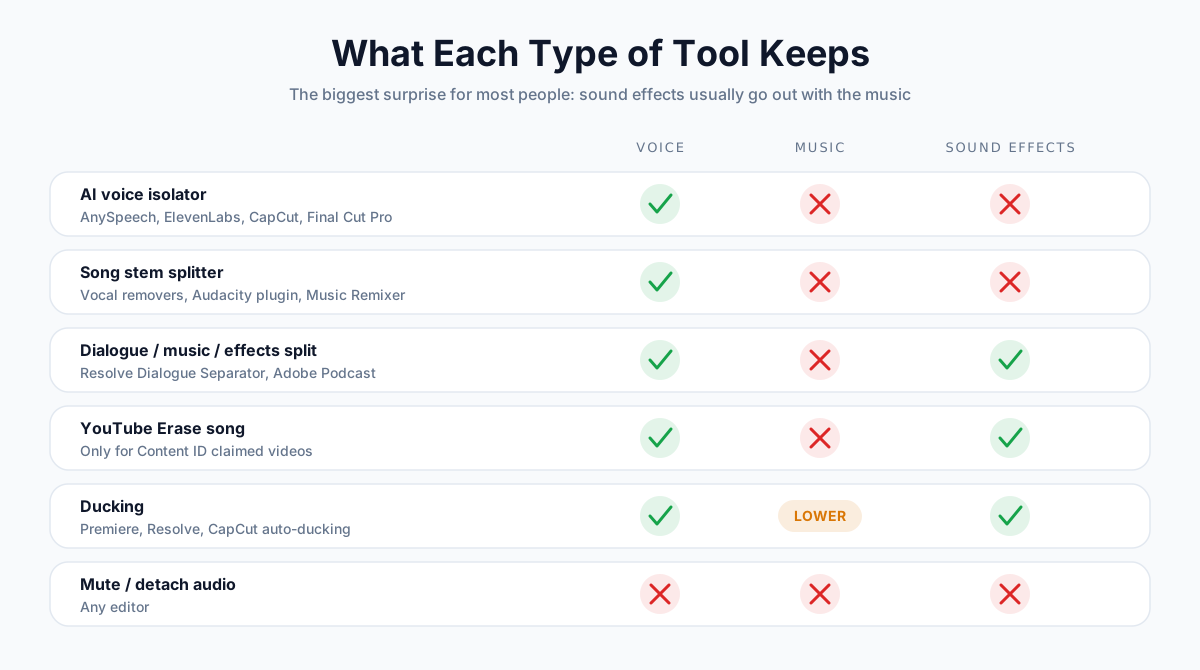
| Tool type | Voice | Music | Sound effects | Examples |
|---|---|---|---|---|
| AI voice isolator | Kept | Removed | Removed | AnySpeech Voice Isolator, ElevenLabs, CapCut, Final Cut Pro |
| Song stem splitter | Kept | Removed | Usually removed | Vocal removers, Audacity AI plugin, Resolve Music Remixer |
| Dialogue/music/effects separator | Kept | Removed | Kept | Resolve Dialogue Separator, Adobe Podcast, AudioShake |
| YouTube Erase song | Kept | Claimed song removed | Kept | YouTube Studio (claimed videos only) |
| Ducking | Kept | Lowered | Kept | Premiere Pro, Resolve, CapCut |
| Mute / detach | Removed | Removed | Removed | Any editor |
💡 Pro tip: If you can't decide between Goal 3 and Goal 4, try Goal 3 first on a 30-second test clip. Many talking-head videos have no meaningful sound effects, and a voice isolator gives the cleanest speech.
Why Removing Music from a Video Is Hard
You don't need the theory to get results. But it explains why some clips come out perfect and others don't.
Music and Speech Share the Same Space
Speech energy sits mostly between roughly 100 Hz and 4 kHz, which is exactly where vocals, guitars, pianos and synths live too. A simple EQ cut that removes the music removes the voice with it.
A Mixed Track Has No "Undo"
Once music and dialogue are mixed into one audio track, there's no hidden layer to switch off. AI models estimate which parts of the sound belong to a voice, based on patterns learned from huge amounts of training audio.
What Makes a Clip Easy or Hard
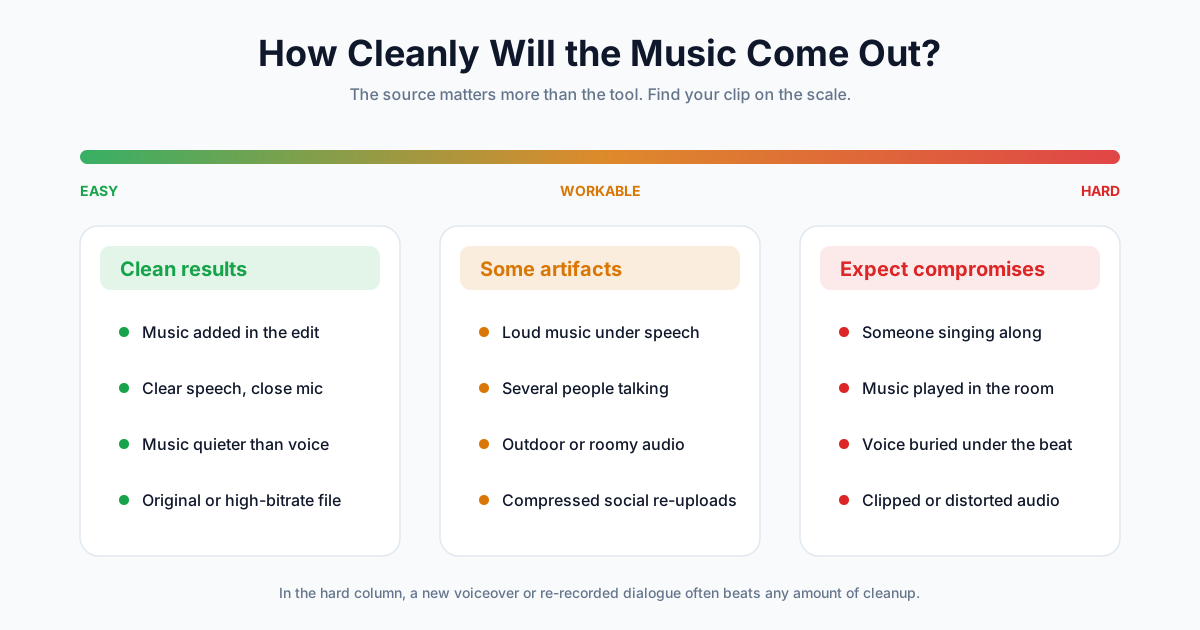
| Situation | Expected result | Why |
|---|---|---|
| Music added in the edit, clear voice | Excellent | Voice and music were recorded separately |
| Music quieter than the voice | Very good | The model has a strong voice signal to work with |
| Loud music under speech | Good, some artifacts | Overlapping frequencies force trade-offs |
| Several people talking over music | Good | Voices are kept, but crosstalk is harder |
| Music playing in the room while recording | Fair | Room echo blends music into the voice itself |
| Someone singing along with the music | Poor | Singing is voice, so it's kept with the dialogue |
| Low-bitrate re-upload from social media | Fair | Compression already smeared the details |
The Round-Trip Workflow Behind Most Methods
Many AI audio tools, including ours, work on audio files rather than video. So most methods follow the same four steps.
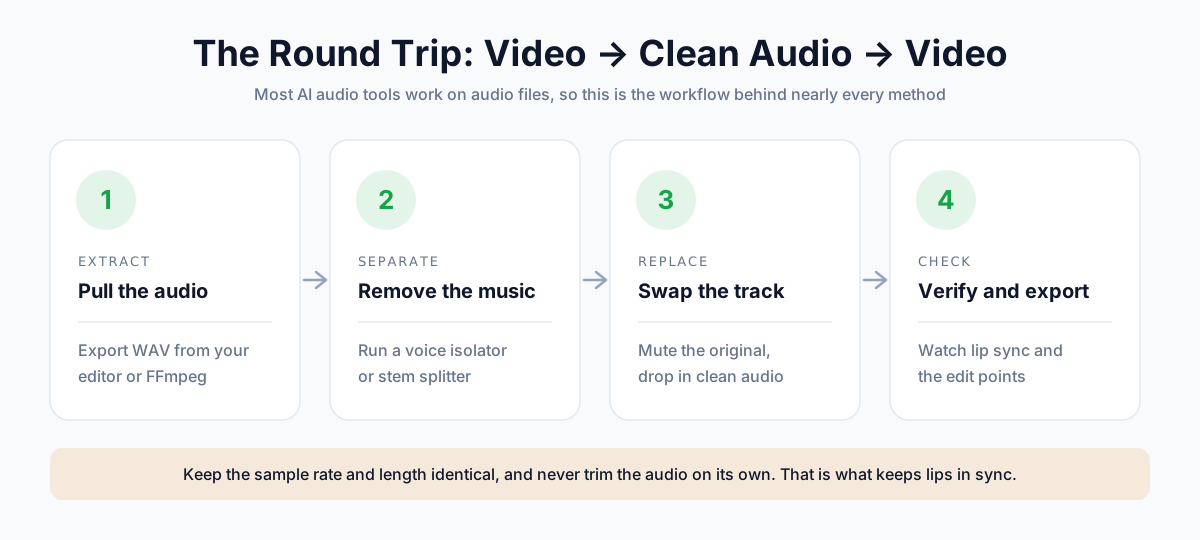
Step 1: Extract the Audio
Export the audio track as WAV (best) or high-bitrate MP3. Every video editor can do this, or you can use FFmpeg (commands below).
Step 2: Remove the Music
Run the audio through a voice isolator or dialogue separator.
Step 3: Replace the Original Track
Mute or delete the original audio in your editor, then import the clean file and line it up at the very start of the timeline.
Step 4: Check and Export
Watch a few seconds with dialogue at the start, middle and end. If the lips match everywhere, export.
📝 Note: Never trim the clean audio on its own. As long as it starts at zero and keeps the same length and sample rate as the original, it will stay in sync.
Method 1: Use an Online AI Voice Isolator
Best for: anyone who wants the cleanest possible voice without learning a video editor.
How to Do It with AnySpeech
- Extract the audio from your video as WAV or MP3 (see the FFmpeg section or use your editor's export).
- Open the AI voice isolator and upload the audio file.
- Click Isolate Voice. Most files finish in well under a minute.
- Preview the result, then download the clean voice track.
- Replace the audio in your video editor or with FFmpeg.
Voice Isolator Limits by Plan
| Plan | Max file size | Max length per file |
|---|---|---|
| Basic / credit packs | 20 MB | 10 minutes |
| Standard | 50 MB | 30 minutes |
| Professional | 100 MB | 60 minutes |
| Premium | 200 MB | 60 minutes |
| Max | 500 MB | 60 minutes |
Voice isolation costs 1,000 credits per minute of audio and is available on paid plans. Accepted formats are MP3, WAV, OGG, AAC and FLAC.
Free Alternative for Music-Heavy Clips
If your clip is basically someone talking over a song, the free vocal remover can also work. It splits audio into a "vocals" track and an "instrumental" track, and the vocals track is your dialogue.
Free accounts get one file per day, up to 10 minutes and 50 MB. It's tuned for songs, so for noisy dialogue the voice isolator gives cleaner speech.
Other Online Tools That Accept Video Directly
Some online services let you upload the video file itself, which skips the extract step.
| Tool | Accepts video | Keeps sound effects | Notes |
|---|---|---|---|
| Adobe Podcast Enhance Speech | Yes (MP4, MOV) | Partly (separate background slider) | Free tier with daily limits |
| ElevenLabs Voice Isolator | Yes | No | Up to 500 MB / 1 hour per file |
| LALAL.AI | Yes | No (voice vs. everything else) | Adjustable noise-cancelling levels |
| AnySpeech Voice Isolator | Audio only | No | Same account covers transcription, dubbing and TTS |
Limits change often, so check each tool's pricing page before relying on a number.
Method 2: Remove Background Music in CapCut
Best for: short-form creators already editing in CapCut.
CapCut has several AI audio features. They're convenient because the video never leaves your editor, but the separation features generally require CapCut Pro to export.
On CapCut Desktop
- Import your video and drag it onto the timeline.
- Select the clip and open the Audio panel on the right.
- Look under Basic for Isolate voice (sometimes labelled Vocal isolation).
- Choose Keep voice to remove the music and background sound.
- Play the clip to check the result, then export.
Separate Audio into Stems
Some CapCut versions also offer Separate audio, which splits the track into parts such as vocals and instruments. Keep the vocals and delete the rest when you want more control than a single toggle.
On CapCut Mobile
- Open your project and tap the video clip.
- Tap Audio (or Extract audio first, if the options are greyed out).
- Look for Isolate voice or Vocal isolation and enable it.
- Preview and export.
📝 Note: CapCut renames and moves these features between updates. If you can't find them, search CapCut's in-app help for "isolate voice."
Method 3: Use "Erase Song" in YouTube Studio
Best for: videos already on YouTube that received a copyright claim for music.
YouTube has a built-in AI tool that removes just the claimed song. You don't have to re-upload, and you keep your views, comments and URL.
How to Erase a Song
- Go to YouTube Studio › Content and filter by Claims.
- In the Restrictions column, hover over the claim and click See details.
- Under the content used, find the claim and click Take action.
- Choose Erase song.
- Pick whether to remove just the song (AI keeps speech and other sounds) or to Mute all sound in the claimed segments. You can adjust the start and end times.
- Continue and save. On the YouTube Studio mobile app, open the video's Restrictions, tap Review issues, then the claim.
Erase Song Options Compared
| Option | What happens | Best when |
|---|---|---|
| Erase song (song only) | AI removes the claimed music and keeps speech and other sounds | Someone is talking over the music |
| Mute all sound | All audio in the claimed segment is silenced | The segment has no important dialogue |
| Trim out segment | The claimed section is cut from the video | The segment isn't needed at all |
| Replace song | Swaps in a track from YouTube's audio library | You want music, just not that song |
Limitations to Know
- It only works on videos with a Content ID claim, not on any video you choose.
- If the AI removal isn't clean enough to release the claim, YouTube may ask you to mute the segment instead.
- It doesn't give you a clean file to use elsewhere.
- Edits can take time to process and generally can't be undone once saved.
Method 4: Remove Music in DaVinci Resolve
Best for: editors who want professional control and the ability to keep sound effects.
DaVinci Resolve's AI audio tools are among the strongest built into any editor. The key features are part of DaVinci Resolve Studio, the paid version (a one-time $295 license at the time of writing).
Resolve AI Audio Features at a Glance
| Feature | What it separates | Keeps sound effects | Best for |
|---|---|---|---|
| Voice Isolation | Voice vs. everything else | No | Clean dialogue, fast |
| Music Remixer | Voice, drums, bass, other | Partly (effects fall into "other") | Rebalancing music-heavy clips |
| Dialogue Separator (newer versions) | Voice, background, ambience | Yes | Removing music while keeping atmosphere |
How to Use Voice Isolation
- Select the clip on the Edit or Cut page.
- Open the Inspector and go to the Audio tab.
- Enable Voice Isolation and adjust the amount.
- Play back and lower the amount if the voice starts sounding processed.
How to Use Music Remixer
- Select the clip and open Inspector › Audio.
- Enable Music Remixer.
- Pull the non-voice stems (drums, bass, other) down to zero.
- If sound effects disappear, raise "other" slightly until they return.
How to Use Dialogue Separator
- Open the Fairlight page, or find the effect in the Inspector if your version shows it there.
- Add Dialogue Separator to the dialogue track.
- Keep Voice up, turn Background down to remove the music, and adjust Ambience to taste.
💡 Pro tip: Resolve's features and their locations change between major versions. Check the Studio feature list for your exact version before buying.
Method 5: Remove Music in Premiere Pro or After Effects
Best for: Adobe users who want to stay inside Creative Cloud.
Premiere Pro: What It Can and Can't Do
Premiere Pro has no one-click "remove music" button yet. It does have two features that get you most of the way.
Option A: Enhance Speech
- Select the dialogue clip.
- Open the Essential Sound panel and tag the clip as Dialogue.
- Click Enhance under Enhance Speech and adjust Mix Amount.
Enhance Speech is designed to clean voices. It reduces background noise and some music, but it isn't a dedicated music remover. Loud music often survives.
Option B: Duck the Music Instead
If the music is on its own track, you don't need to remove it at all:
- Tag the music clip as Music in Essential Sound.
- Enable Ducking and set Duck against to Dialogue.
- Click Generate Keyframes.
Option C: Round-Trip Through an AI Tool
For music baked into the dialogue track, export the audio, clean it with Adobe Podcast or another voice isolator, then import the clean file back and replace the original.
After Effects: Use a Workaround
After Effects has no built-in music removal. The practical options are:
- Move the edit to Premiere Pro through Dynamic Link and use the options above.
- Export the audio, clean it with an online voice isolator, then import the clean file and replace the original audio layer.
Adobe Options Compared
| Option | Removes baked-in music | Keeps sound effects | Extra cost |
|---|---|---|---|
| Enhance Speech (Premiere) | Partly | No | Included |
| Ducking (Premiere) | No, only lowers it | Yes | Included |
| Adobe Podcast Enhance Speech | Yes | Partly | Free tier, paid for more |
| Round-trip to a voice isolator | Yes | No | Depends on tool |
Method 6: Remove Music on Mac and iPhone (Final Cut Pro, iMovie, Photos)
Best for: Apple users who don't want extra software.
Final Cut Pro: Voice Isolation
Final Cut Pro includes Voice Isolation (since version 10.6.2):
- Select the clip in the timeline.
- Open the Audio inspector.
- Tick Voice Isolation and drag its slider.
It prioritizes human voices and reduces music and background sound. At high settings the music drops a lot, but it's not a clean music/effects split.
iMovie on Mac: Reduce Background Noise
- Select the clip and click the Noise Reduction and Equalizer button above the viewer.
- Tick Reduce background noise and raise the slider.
This targets steady noise like hum and wind. It helps a little with quiet music, but it isn't designed to remove songs.
iPhone: Audio Mix in the Photos App
Videos recorded with Spatial Audio on iPhone 16 models and later (including iPhone 17 and iPhone Air) can use Audio Mix:
- Open the video in Photos and tap Edit.
- Tap the Audio Mix button.
- Choose Studio to reduce background sounds and reverb, or In-Frame to reduce sounds from sources outside the shot.
- Drag the intensity slider to control how strong the effect is.
It only works on your own Spatial Audio recordings, not on downloaded or imported clips.
Apple Options Compared
| Tool | Platform | Removes music well | Cost |
|---|---|---|---|
| Final Cut Pro Voice Isolation | Mac | Good | Paid app |
| iMovie noise reduction | Mac | Weak | Free |
| Photos Audio Mix | iPhone 16 and later | Good for own Spatial Audio recordings | Free |
| Browser voice isolator | Any device | Very good | Paid plan |
Method 7: Remove Background Music with Audacity (Free)
Best for: people who want a completely free, offline method and don't mind a few extra steps.
Audacity can't edit or export video. But it can clean the audio, which you then put back with your video editor or FFmpeg.
What You Need
| Component | Why |
|---|---|
| Audacity | Free audio editor for Windows, macOS and Linux |
| FFmpeg library for Audacity | Lets Audacity import audio from MP4, MOV and other video files |
| Intel OpenVINO AI plugins | Adds Music Separation, an AI model that splits vocals from music |
| A video editor or FFmpeg | To put the clean audio back into the video |
Step by Step
- Install FFmpeg for Audacity through Audacity's preferences (Libraries section) if it isn't detected.
- Import the video with File › Import › Audio. Audacity loads only the audio track.
- Select the whole track.
- Go to Effect › OpenVINO AI Effects › OpenVINO Music Separation.
- Set Separation Mode to (2 Stem) Instrumental, Vocals and click Apply.
- Delete or mute the Instrumental track. The Vocals track is your dialogue.
- Export it with File › Export Audio as WAV.
- Replace the video's audio with the WAV file in your editor or with FFmpeg.
📝 Note: The Music Separation model is trained on songs, so sound effects usually land in the "instrumental" track. The OpenVINO plugins are built for specific Audacity versions; check the compatibility notes on Audacity's download page if the effect doesn't appear.
For a deeper walkthrough of this plugin, see our guide on how to remove vocals from a song.
How to Extract and Replace Audio with FFmpeg
FFmpeg is a free command-line tool that handles the round trip in seconds without re-encoding your video.
Extract the Audio as WAV
ffmpeg -i input.mp4 -vn -ac 2 -ar 48000 audio.wavPut the Clean Audio Back
ffmpeg -i input.mp4 -i clean.wav -map 0:v -map 1:a -c:v copy -c:a aac -b:a 192k -shortest output.mp4What Each Option Does
| Option | Meaning |
|---|---|
-vn | Drop the video stream, keep audio only |
-ac 2 -ar 48000 | Stereo audio at 48 kHz, the standard video sample rate |
-map 0:v | Take the video from the first input (your original video) |
-map 1:a | Take the audio from the second input (your clean file) |
-c:v copy | Copy the video without re-encoding, so quality stays identical |
-c:a aac -b:a 192k | Encode the new audio as AAC, which MP4 files expect |
-shortest | Stop at the end of the shorter stream |
💡 Pro tip: If your original video uses 44.1 kHz audio, change -ar 48000 to -ar 44100 so the clean track matches exactly.
When Music Can't Be Fully Removed
Sometimes no tool gives a result good enough to publish. That's usually the source, not the software.
Signs You've Hit the Limit
- The voice sounds metallic or "underwater" at any setting that removes the music
- Someone sings or hums along with the song
- The music was playing in the room, so it echoes inside the voice itself
Better Alternatives
| Situation | Try this instead |
|---|---|
| Short music section | Remove only that section and crossfade, or cover it with a cutaway |
| Your own talking-head video | Re-record the voiceover over the original footage |
| Scripted narration | Generate a new voiceover with AI text to speech |
| Content going to other languages | Use AI dubbing, which rebuilds the speech in the new language |
| You need the words, not the audio | Transcribe the speech and use captions |
How to Fix Common Problems
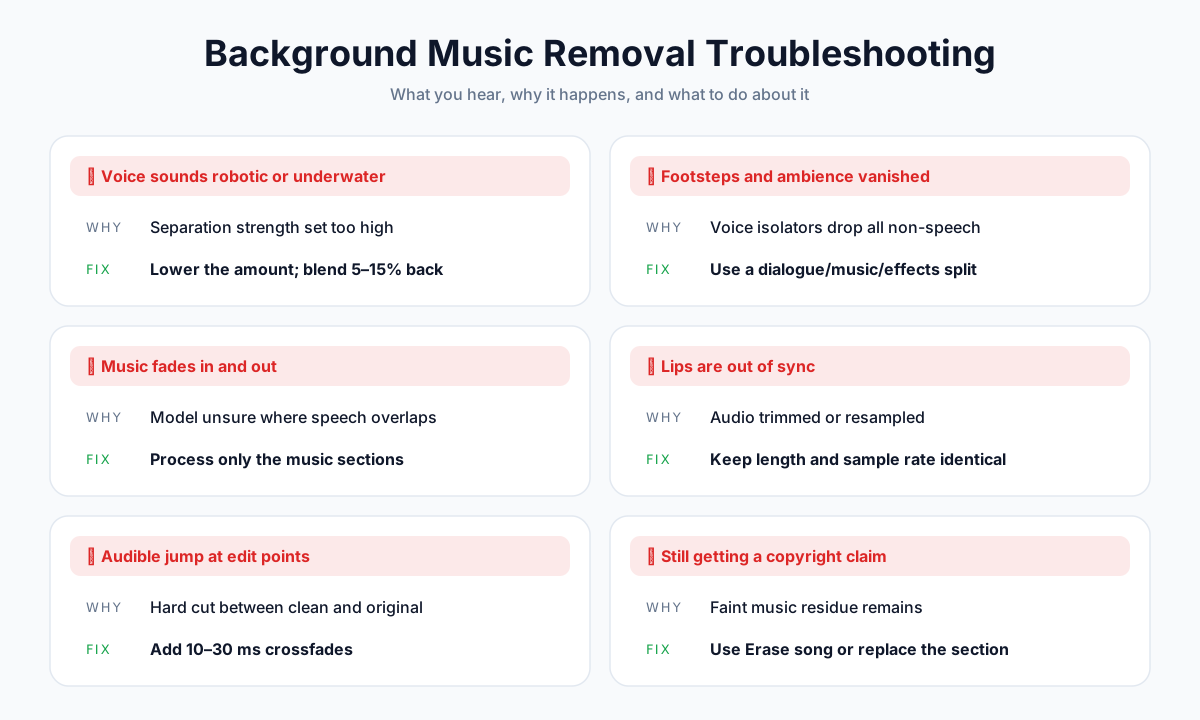
The Voice Sounds Robotic or Underwater
Why: the separation is too aggressive, so parts of the voice were removed along with the music.
Fix:
- Lower the strength or amount setting.
- Blend 5–15% of the original audio back underneath. A trace of music masks artifacts surprisingly well.
Footsteps, Laughter and Ambience Disappeared
Why: voice isolators and song stem splitters treat every non-speech sound as noise.
Fix: use a dialogue/music/effects separator (Goal 4), or layer in room tone and sound effects from a library.
The Music Fades In and Out
Why: the model is less confident where speech and music overlap.
Fix: process only the sections that contain music, and leave music-free sections untouched.
The Lips Are Out of Sync
Why: the clean audio was trimmed, resampled or placed at the wrong start point.
Fix: keep the clean file's length and sample rate identical to the original, and align it at zero.
Sync Checklist
| Check | What to look for |
|---|---|
| Start point | Clean audio starts at exactly 0:00 on the timeline |
| Length | Same duration as the original, to the frame |
| Sample rate | Matches the original (usually 48 kHz for video) |
| Frame rate | Unchanged when exporting the final video |
You Hear a Jump at the Edit Points
Why: a hard cut between cleaned and original audio.
Fix: add short crossfades of about 10–30 ms at every transition.
The Video Still Gets a Copyright Claim
Why: faint musical residue can still match Content ID.
Fix: on YouTube, use Erase song. Elsewhere, remove or replace the affected section entirely.
Does Removing Music Solve Copyright Problems?
Removing a copyrighted song can resolve a music claim, but it doesn't give you any rights to the rest of the video.
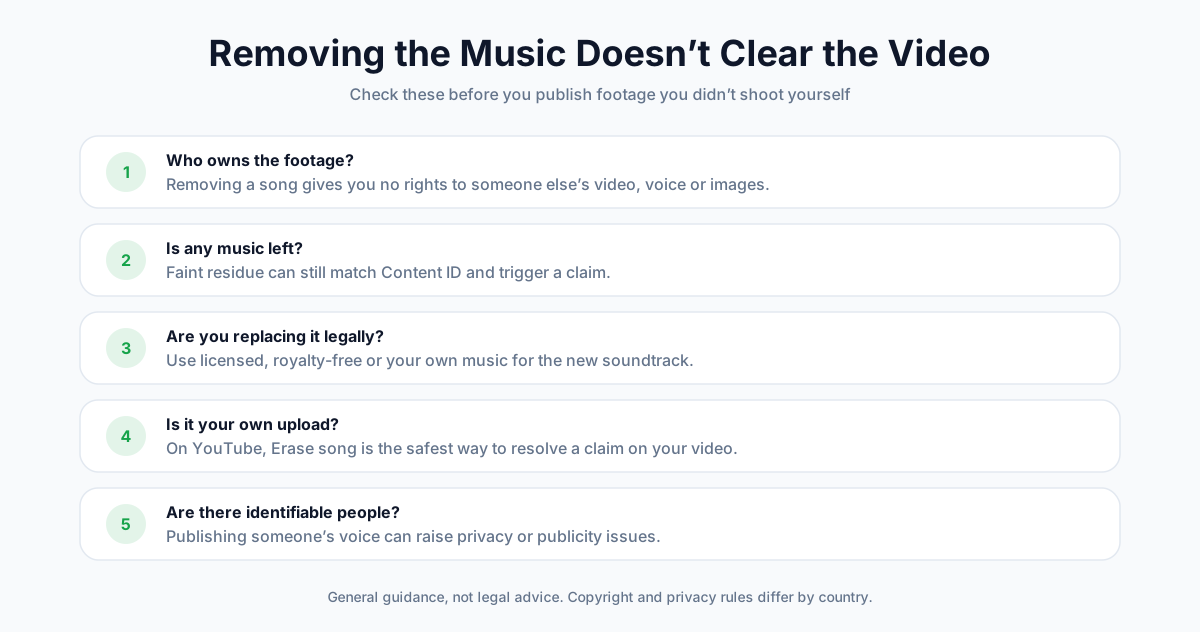
What Changes and What Doesn't
| Scenario | Does removing the music help? |
|---|---|
| Your own video with a claimed song | Yes. Erase song or a clean re-upload usually resolves the music claim |
| Someone else's video you want to repost | No. The footage, voices and images still belong to them |
| A film or TV clip | No. Removing the soundtrack doesn't make the clip reusable |
| Your own video you want to re-score | Yes, as long as the new music is licensed or royalty-free |
📝 Note: This is general guidance, not legal advice. Copyright and privacy rules differ between countries and platforms.
Frequently Asked Questions
Can you remove background music from a video but keep the voice?
Yes. AI voice isolators separate speech from music and return a clean voice track. Export the video's audio, run it through a tool such as the AnySpeech voice isolator, Adobe Podcast or DaVinci Resolve's Voice Isolation, then replace the original audio. Results are best when the voice is louder than the music.
How do I remove background music from a video for free?
Use Audacity with Intel's free OpenVINO Music Separation plugin to split the audio into vocals and instrumental, then put the vocals back with a free editor or FFmpeg. Adobe Podcast also has a free tier. For short clips, AnySpeech's free vocal remover gives free accounts one file per day, up to 10 minutes.
How do I remove background music but keep the sound effects?
You need a dialogue/music/effects separator rather than a voice isolator. DaVinci Resolve Studio's Dialogue Separator, Adobe Podcast's separate background controls and professional tools like AudioShake can keep ambience and effects while removing music. Voice isolators remove effects along with the music.
How do I remove copyrighted music from a YouTube video without deleting it?
In YouTube Studio, open the video, click See details on the copyright claim, choose Take action, then Erase song. Choose to remove just the song, which lets AI keep speech and other sounds, or mute all sound in the claimed segment. The video keeps its URL, views and comments.
How do I remove background music in CapCut?
Select the clip, open the Audio panel and turn on Isolate voice (or Vocal isolation), choosing to keep the voice. On some versions, Separate audio splits the track into vocals and instruments. These AI features generally require CapCut Pro to export.
Can Premiere Pro remove background music?
Not directly. Premiere Pro's Enhance Speech cleans dialogue and reduces some background music, and auto-ducking lowers music under speech. To fully remove music baked into dialogue, export the audio, clean it with an AI voice isolator, then import it back.
How do I remove background music in After Effects?
After Effects has no music-removal feature. Move the edit to Premiere Pro via Dynamic Link, or export the audio, clean it with an online voice isolator, and replace the original audio layer with the clean file.
Can I remove background music from a video on my iPhone?
On iPhone 16 models and later, open a video you recorded with Spatial Audio in Photos, tap Edit, then Audio Mix, and choose Studio to reduce background sound. For other videos, use CapCut's voice isolation, or export the audio and use a browser-based voice isolator.
Why does my voice sound robotic after removing the music?
The separation was too aggressive, so the model removed parts of the voice that overlapped with the music. Lower the strength, start from the best-quality source, and blend a small amount (5–15%) of the original audio back in to mask the artifacts.
Will removing the music stop a copyright claim?
Often, yes, for music claims on your own videos. YouTube's Erase song releases the claim when the removal succeeds. But faint residue can still trigger matches, and removing music never gives you rights to someone else's footage.
The Bottom Line
Removing background music from a video is no longer a job for audio engineers. The trick is choosing a tool that matches what you want to keep.
Here's the short version:
- Decide your goal. Mute, duck, voice only, or voice plus effects.
- Voice only? Export the audio, run it through a voice isolator, and put it back.
- Already on YouTube with a claim? Use Erase song.
- Need sound effects too? Use Resolve Studio's Dialogue Separator or Adobe Podcast.
- Keep sync safe. Same length, same sample rate, aligned at zero.
Ready to try it? Upload your audio to the AI voice isolator and get a clean dialogue track back in seconds.
Working with songs rather than video? Read our guide on how to remove vocals from a song, or compare more options in our best audio isolation tools roundup.
Author

Categories
More Posts

How to Turn On Voice Isolation: Step-by-Step Guide for Every Device (2026)
Learn how to turn on voice isolation on iPhone, iPad, Mac, and Android. Step-by-step instructions for FaceTime, phone calls, and tips for AI audio isolation tools.

Convert Text to Audio: The Complete Guide to Converting Text Into Speech (2026)
Learn how to convert text to audio in minutes using AI voices. Free tools, step-by-step guide, voice quality tips, and best use cases for content creators, educators, and marketers.

Text to Speech for Accessibility: A Guide for Dyslexia, ADHD & Low Vision (2026)
How text to speech helps with dyslexia, ADHD, and low vision — who it helps, what the research says, what to look for in a tool, and how to start reading by ear for free.